How To Update Office 365 and Enable MFA
Use the methods below to Update Office 365 and Enable MFA
How to update Microsoft Office 365
- Open any Office app, such as Word, and create a new document.
- Go to File > Account (or Office Account if you opened Outlook).
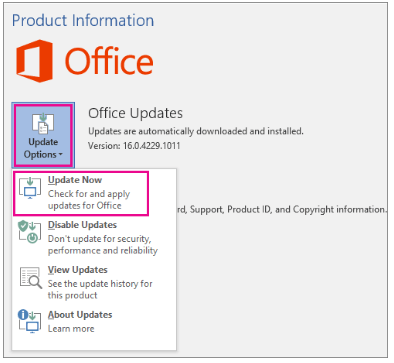
- Under Product Information, choose Update Options > Update Now.
- Close the “You’re up to date!” window after Office is done checking for and installing updates.
Note: You may need to click Enable Updates first if you don’t see the Update Now option right away.
How To Enable Office 365 MFA (Multi-Factor Authentication)
A Step-By-Step Setup Guide
Before we begin, you (or your IT administrator) must have enabled MFA and the Azure feature called “Users can use preview features for registering and managing security info – enhanced” before being able to follow the steps below.
Once enabled, follow the guided steps below:
Multi-Factor Authentication Video Guide

Step 2: Click on “Sign In” in the top menu bar. Type your User Name and click “Next“
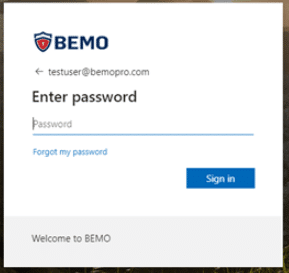
Step 3: Type your Password for Office 365 and click “Sign In“.
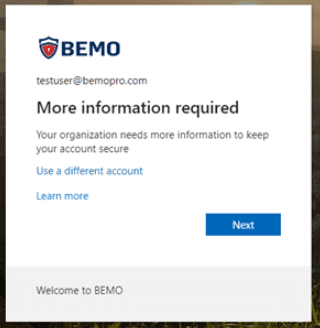
Step 4: Now you will be required to start enrolling your device. Click “Next” to continue.
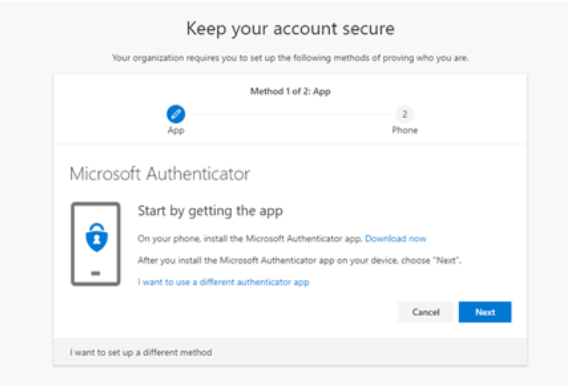
Step 5: Begin the wizard to install the “Microsoft Authenticator” app on your phone.
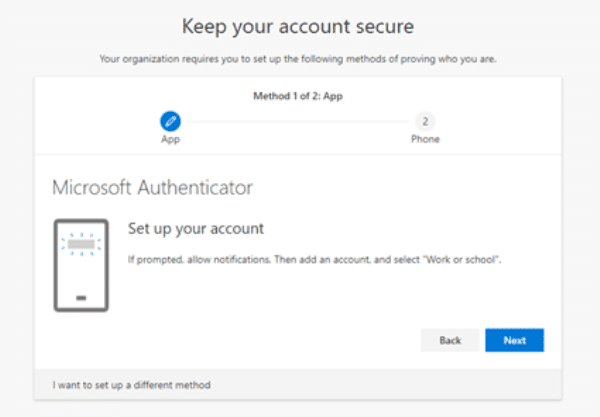
Step 6: Install the app and allow it to use your camera (if asked). Click “Next“
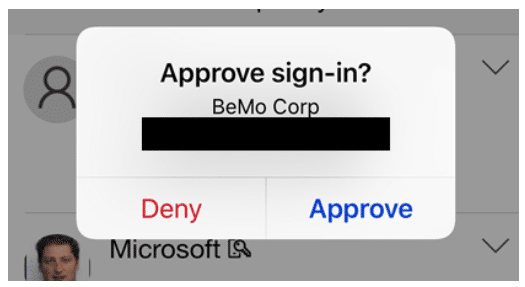
Step 7: Validate the install and test logging in
You will receive a ‘pop up’ notification on your phone. Press the “Approve” button.
If the setup is successful, you will see “Notification approved” and can click “Next“
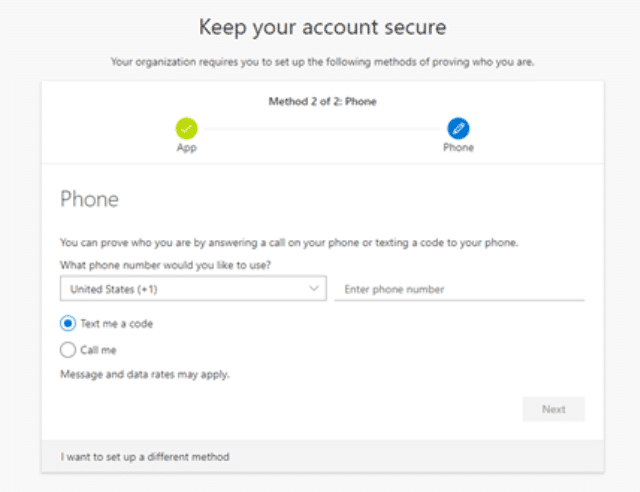
Step 8: Setup a Backup Validation Solution
This example shows a text message verification. Enter the code and click “Next“.

Step 9: Verify Backup Solution and Complete Setup
Click “Next” and then “Done” on the final page.
Are you worried that you or an employee were tricked by a scammer?